If you’re like me, you likely have no less than ten tabs open at any given time. When you work from home on a laptop or desktop, it can be frustrating and time-consuming to try and toggle through each tab to find the one you’re looking for. Instead of doing this inefficient scan, you can split your screen to keep two windows open at the same time. Split-screen mode is great for looking at data for a report, keeping chat windows open while doing something else, or just having a video play on one side of your screen while you multitask.
Fortunately, Macs offer a split screen mode, which allows you to stick two apps (or two separate browser windows) on different sides of your display. That way, you can glance between windows without having to navigate with your mouse or pressing Command + Tab.
Here’s everything you need to know about setting up and navigating split-screen mode on Mac.
How to enter Split View on a Mac
1. Make sure neither window you want to use is in full-screen mode.
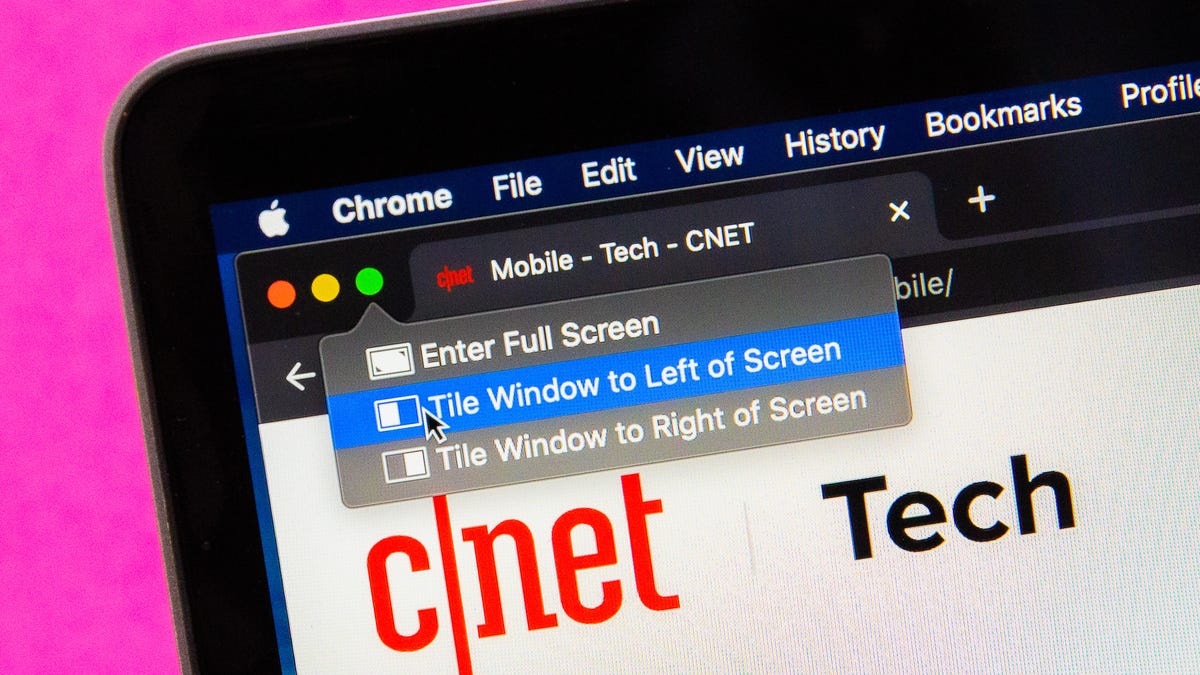
2. In one of the windows you want to use, place your cursor over the green button in the top left. Instead of clicking to maximize the window, hover until you see a drop-down menu.
3. Select Tile Window to Left of Screen or Tile Window to Right of Screen. Your Mac will automatically enter split-screen mode.
4. From there, other open windows will be displayed on the opposite side of the screen. Click the window you want on the rest of your screen, and it will fill the remaining half.
5. If you want to adjust the size of the windows, use the slider in the center of the screen.
In Split View, you’ll be able to look at both windows simultaneously. Multitask away!
Read more: This Is One Thing Every Mac Owner Should Know How to Do
How to exit split screen on Macs
If you’re done using the split screen layout, here’s how to get out of it:
1. Move your cursor to the top of the screen until you see the sizing buttons at the top left of each window.
2. Click the red button to close that window or the…
Read the full article here


