You send a folder full of photos to your friend who uses Windows. They can’t figure out how to open them. What do you do?
The photos in question are likely HEIC photos, which aren’t easy to open on Windows (and also difficult for many desktop apps). And while you could open every single photo in Preview or your photo editing app of choice and export them to another format, there’s a faster way on the Mac. The problem: It’s just a little bit hidden. Here’s how to convert any large collection of photos in just a couple of clicks.
Bulk convert photos in macOS finder
To get started, head to the folder of photos you want to convert in the Finder. Select all the photos you want to convert—you can also use the keyboard shortcut CMD-A to select every photo in a folder, if you want them all, or you can hold down the Shift key and select all the photos you want to convert.
Once you’ve selected the photos you want to convert, right-click. In the menu that pops up hover over “Quick Actions” and then click “Convert Image.”
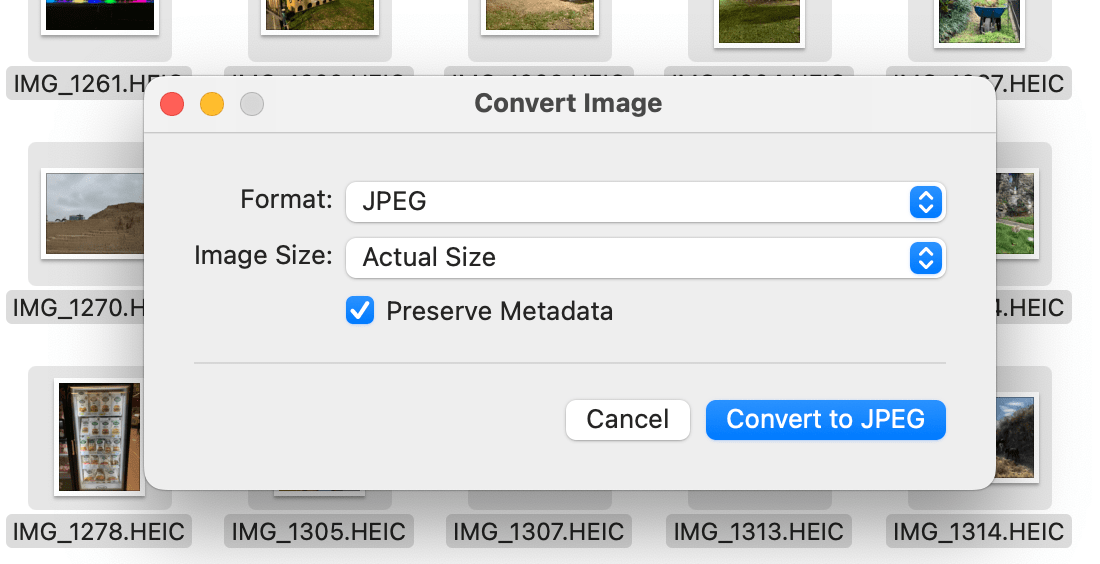
You will be asked which format you want to convert the images to—you can choose JPEG, PNG, or HEIF.

You also decide how big the converted image should be—the choices are actual size, Large, Medium, and Small. When you’re ready, click the “Convert” button.
Every selected photo will be converted to the format you selected. The old photos will not be deleted; the new photos will be in the same folder. It’s up to you to delete the old files, if that’s what you want.
Convert HEIC images in preview
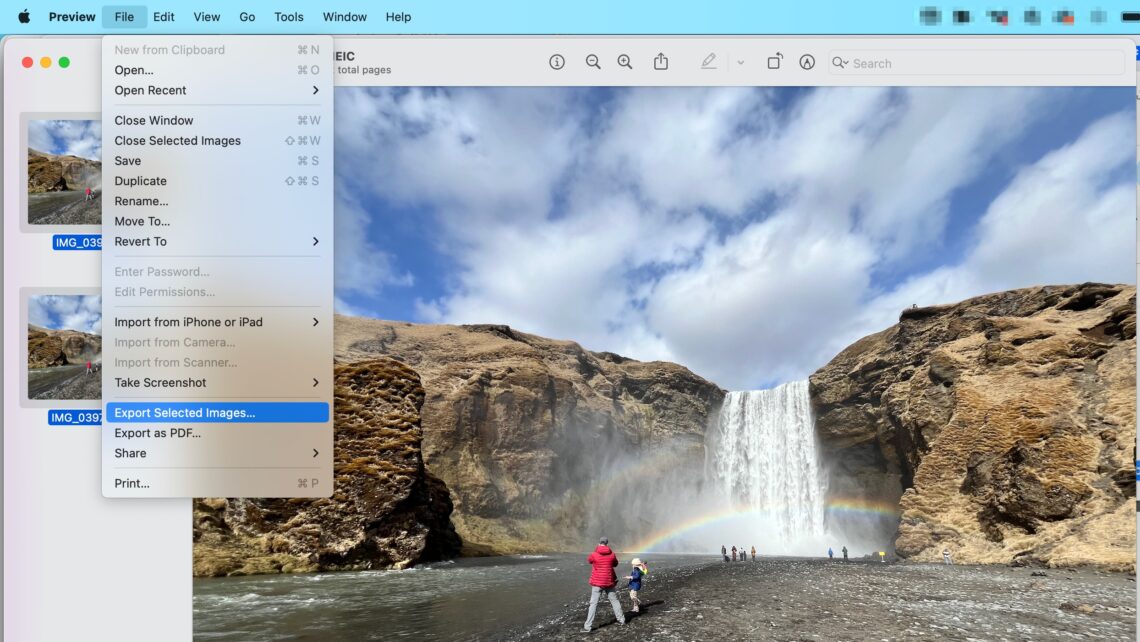
The quick convert tool works but isn’t perfect. You can’t really fine-tune the image quality, for one thing, and you can’t choose a folder for the converted images to end up in. If you want a little bit more control you can use the Preview app for the conversion instead. To get started open all of the photos you want to convert in Preview. They will show up…
Read the full article here


